
5 September 202422:25489 views on YouTubeWatch on YouTube
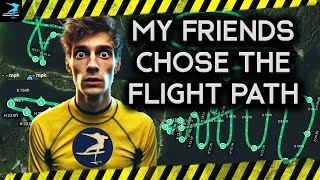
Getting good drone footage of your own riding runs into an obvious problem: you cannot fly the drone and ride at the same time, and the person you talk into holding the controller is probably not a trained pilot. This episode is the behind the scenes for Flightpath One, a two mile eFoil run around a lake captured as one continuous take, and the method it uses removes the pilot from most of the job.
Why not just fly it manually, or fly FPV
Manual flying with sticks gives the best results in skilled hands, and it is the only way to get proper parallel travelling shots where the drone matches your speed alongside you or flies backwards ahead of you so your face is in frame. It is also genuinely hard and easy to put in the water. FPV with goggles and a motion controller is far easier to learn and produces good chase and follow shots, but you are mostly limited to chasing, because flying in a direction you cannot see is difficult. The third option, and the subject of this episode, is to program the flight in advance so nobody has to fly it at all.
Building the waypoint path
The walkthrough is done on a DJI Air 3. First switch the map from plain GPS to satellite view, which makes it far easier to line waypoints up against real features like your own dock rather than a neighbour’s. Then open waypoint mode and tap to drop points along the route you want flown. Waypoint one sits by the launch and is set to start recording. A useful habit is putting waypoint two very close to waypoint one, then adding a short zigzag on the way out, which buys both the rider and the camera operator time to get set up and aligned before the real run begins. From there the path is drawn around the lake, into the bays, and back home.
Altitude, speed and letting the camera stay manual
The default altitude is far higher than you want for a water sport, so it gets set low and applied to every waypoint. Sixteen feet above the water is the figure settled on as the best mix of safety and drama. Nine feet has been tried and is where things get risky, because glassy water can stop the drone seeing the surface at all and it may start dropping. Global speed is set to roughly the pace you like to ride at when being filmed, around 22 mph, with individual corners set faster so the drone wraps in tighter around you. Crucially, heading, tilt and zoom are all set to manual, so the drone flies itself and the operator only steers the camera to keep you in frame. That job is easy enough for almost anyone, and the advice is to make tiny, soft movements rather than big corrections.
Shoot wide, fix it later, and save the path
The most useful single tip is to sit further away from your subject than you think you want. You can always upscale a wide frame with AI software like Topaz and end up looking closer while keeping 4K resolution, but you cannot put a rider back into a shot they were cropped out of. Ignore the telephoto lens for this reason. After Effects stabilisation handles the rest. Paths can be saved by name and recalled, which matters because the rider needs several attempts to learn where the drone will be, and watching for the drone makes you ride worse. Keep the pilot’s hand near the pause button throughout, in case the drone does something unexpected over reflective water.
Chapters
- 00:00 Introduction
- 00:43 1-Take Drone Efoil
- 01:12 FPV vs Cinema Drone
- 02:42 Don't have a good pilot?
- 03:52 Pre-programmed flight path advantage
- 05:43 Preprogram camera too?
- 07:13 How to set a flight path
- 07:51 Switching to "Satellite View"
- 08:15 Launching waypoint flight mode
- 08:40 Setting your first waypoint
- 14:28 Setting drone altitude
- 16:00 Setting drone flight speed
- 16:55 Setting drone camera to manual
- 17:39 Saving a drone flight path
- 18:16 Deleting a waypoint
- 19:10 Drone auto flight launch
- 21:21 Verdant Ride eFoil Outro
Subscribe on YouTube Every episode